Friday 23 March 2012

And the Blog Candy goes to....

I'm happy to announce the winner of the blog candy from my entry in the Card a Day Blog - Spring has Sprung Blog Hop!


bzyPTmom, look out for my email, so I can get the details you'd like to include in your custom Roller Coaster Card!
I'm so excited for you! (And hey, it gives me an excuse to make another card, and that's a good thing!)


Monday 19 March 2012

Spring Has Sprung! What a Ride Birthday Card!

Spring Has Sprung!
The designers at Card a Day Blog are joining together to do a Blog Hop! The theme is dimensional cards!
To join in....visit all the participating designers by visiting their sites, some are having prize giveaways...so make sure you pop in! Make sure you comment on all the blogs too, because at the end of the blog hop, they are going to send a list of all who commented on their blog, and we are going to do a grand prize drawing of all comments on each blog! The grand prize is your choice of a pdf pattern book, valued up to $20, from http://popupcards.com/shop-patterns.html ! Make sure to check back at Card a Day Blog March 23rd, to see who won!
So JOIN IN TODAY....comment on the main blog page, and visit the other hop pages and comment there too!

Now for my entry!
I’m so excited to be a part of the third blog hop from the Card a Day Blog! The theme of the hop is “anything dimensional” – I know that you’ll be inspired by what we’ve designed for you! Make sure to leave a comment on the participants pages, and the Blog Hop announcement post, and every comment will give you an entry for the grand prize of a pdf pop up book (up to $20 value) from popupcards.com!
Information on my blog candy is at the end of this post!
About my card:
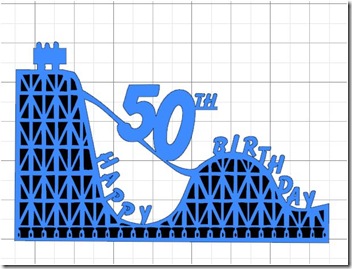
Someone dear to me is turning 50 years old this year! She loves roller coasters and similar rides (and is trying to talk me into doing a some bungie jumping!) – when I saw the rollercoaster design from pop up cards.com , I just had to try to make my own design!
The card is made totally with my Sihouette Cutter. I used Silhouette Studio to design the card with some of the elements in my library.  The actual roller coaster was snagged by a google image search, but I did extensive adjustments to make the cross bracing larger, and therefore easier to cut IMHO :-)
The outside has layered elements:
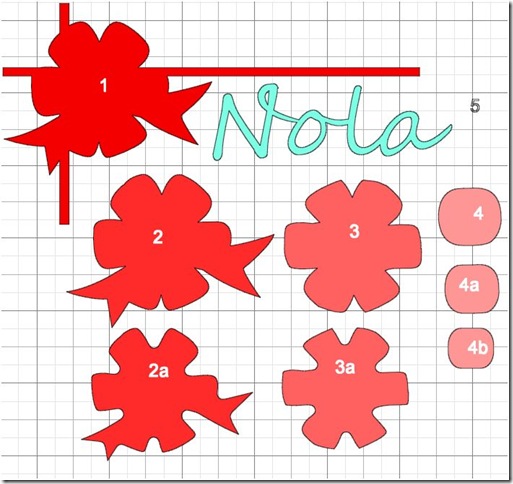
Card Outside
  1. Ribbon base
  2. Bow base
  3. Bow details
  4. Bow center
  5. Name
I used a ball tipped floral tool to add some dimension to the bows.
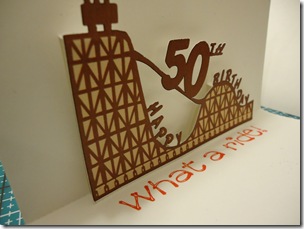
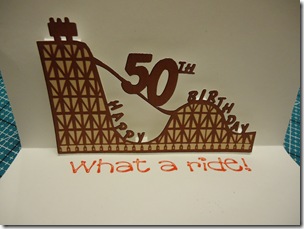
The inside is composed of a sentiment printed “base”, which I glued the roller coaster on:
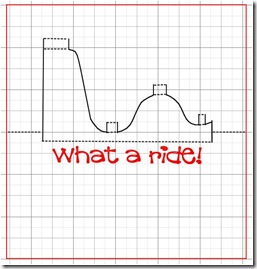
Inside card backgroundCard inside coaster

I’m quite pleased with how it turned out!
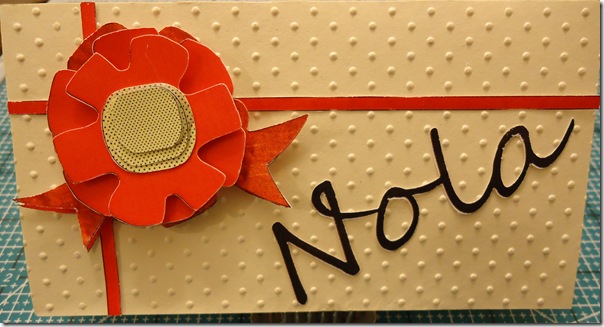
DSC00903
DSC00905DSC00904
Now for blog candy Smile
On top of being automatically entered into the grand prize of the blog hop for commenting on my post, I’m also going to have a draw for:
A personalized card for you of this blog post (with custom “year” and “name”), so you can give it to someone too! 
The random draw for my blog candy will be held on March 22nd. Final entries accepted  until 12am March 22.
Blogger doesn’t forward your email to me when you comment, so to maintain your privacy, please just check back here on March 23rd to see who has won! The winner has until March 31st to claim their prize by contacting me after the announcement!

Thursday 15 March 2012

Card a Day Blog–Well Done!

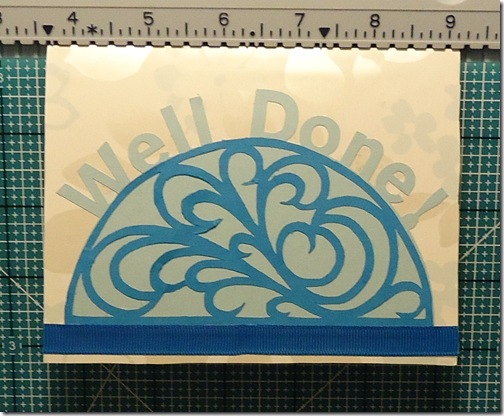
Hi! Thanks for visiting from the Card a Day Blog! I’m hoping to inspire you with a “well done” card that is easily done!
My inspiration came with a swirly frame  I downloaded at basteln-mit-elisabeth – it’s a German website, but she does have some nice inspiring designs there!
bogen08c
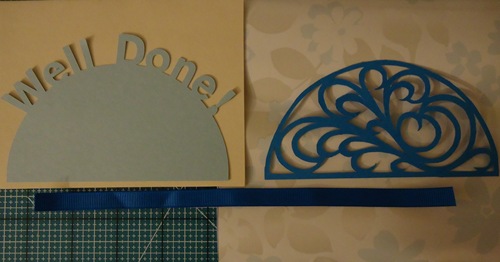
I cut out the frame, and made a mat, welding “Well Done!” along the top edge of the mat.
I glued a co-coordinating giftwrap to the card base, and then the mat & frame. The bottom edge has a piece of ribbon to define it better.
Here are the pieces of the card before assembly:
DSC00897
Here is the completed card!
DSC00900
If I was to do this design again, I would reverse the coloring, have the frame in the lighter color.  As usual, every card teaches me something about color and composition. I think that’s one reason I like making cards so much!
I’ve had some more fun adjusting the above mat and frame into a one layer cut…. Here is  jpeg file for it that you can use your cutting program to trace --- I would love to hear what file formats you use that I could give as blog candy! Let me know in the comments!
card front idea

Remember to join us for some fun! Submit your card in our March Challenge!
ENTER HERE:

Monday 12 March 2012

Manuka Honey and a New Blog Announcement

I tend to get into trouble with hubby when he sees what I've spent on items that seem outrageously expensive.  I can't say I blame him, especially when he saw the order invoice for my most recent find.

I was reading an ebook on the benefits of honey that mentioned Manuka honey, which I had never heard of before ~ so I had to order it!
http://www.wedderspoon.ca/shop/organic-honey/organic-manuka-honey-active-16.html
My intention was to use it on my face. I have rosacea, and my face has looked so bad in the past month or so, as I have dermatitis too.
Well, I've gotta tell you, 'twas the best $40 I've ever spent.  It takes less than 1/3 of a teaspoon to spread a layer of honey over my whole face.  I leave it on for about 15 minutes, and then rinse off. With just 5 treatments (one per day), my face looks and feels new! There is still redness to my skin when I use a warm facecloth, but I don't notice it otherwise. The scaliness is gone too! No more angry looking frown lines on my face! Yippee!
It just goes to show you that sometimes simple things are the best remedy!
I really wish I would have taken before and after pictures, then you would have understood why I've done this post about it too!

I was inspired this week when I visited CherylNDesigns 365 day challenge ~ she is posting a picture a day for the year. I thought "what a good way to make turning 50 special"! So in honor of turning 50 next month, I'm going to do a year of posting a picture a day on its own blog! So stay turned for the blog announcement I'll post when it goes live! There won't be any words, just pictures, sometimes linked back to this blog if I have something to post about the garden or what I'm doing (or planning to do!).

Sunday 11 March 2012

Congratulations!

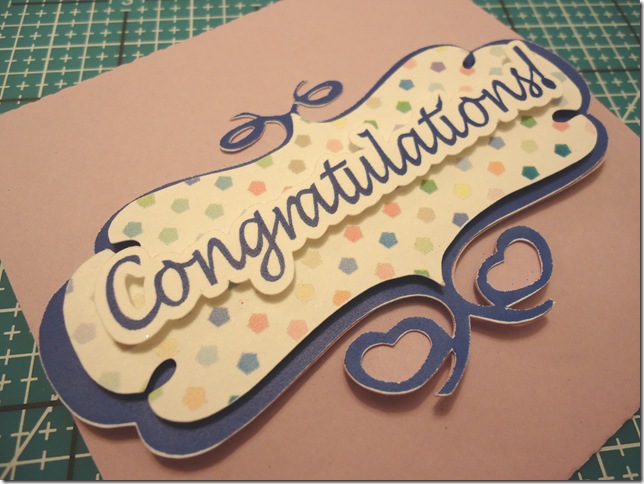
This is a simple, paper saving card, as I used the print and cut capabilities of my Silhouette cutter! I love doing this as all the colors of the card can be co-ordinated easily!
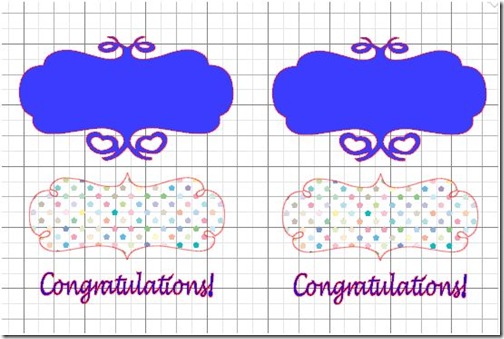
I started my design using a swirly tag I snagged from a freebie from the net. I adjusted the two layers and offset them slightly, coloring the background a dark blue, and the top a multi colored polka dot graphic.
I made the wording, offsetting the cut so it could be easily attached to the tag with dimensional adhesive.
Here is how the tag looked on my computer screen before I printed and cut it out:


outside tags

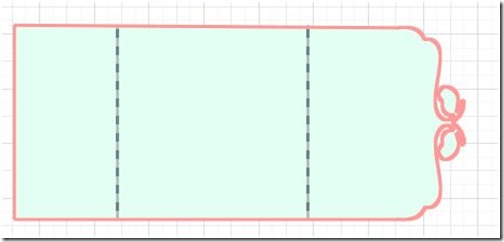
The card base is a tri-fold that I made welding the tag back to an edge of a rectangle. The solid lines in the picture below are fold lines. I cut it out with a piece of mauve paper that matched the color in the polka dot part of the tag.
tri fold base

Here are all the pieces cut out!

The folded card is 3 1/2 inches square, but could be easily sized to 3 1/2 x 5 inches. I plan to use this card for a gift tag that quite a few people could sign inside.

DSC00891
Make sure to visit the Card a Day Blog tomorrow for more “Congratulation” ideas!
Remember the Challenge! Its one way you can join in the fun, and inspire us too!
ENTER MARCH CHALLENGE: