Saturday, 25 May 2013

May 24th and 25th - Front yard update

I think I must have put in well over 12 hours the past two days on the front yard renovation.  I am exhausted, but as soon as I post this, I’ve got to mow the back lawn (much neglected).

At 11:30 am this morning:

DSC02161

After 6 hours of labor, the front yard is starting to take shape.:

DSC02163

The plants on the lower part of the picture have just been heeled in, as I’m moving around a lot of plants that were already in the yard.

I think I am about 1/2 way through…. there is more sod to take out (I think I took out 1/2 of it so far). I want to make a annual flower bed that has room to walk around it, and then have more plants to plant for the perennial/evergreen part of the front garden.  Then probably 2 loads of shredded bark mulch to put in, to keep everything easy to maintain.

Its going to take me two weeks to accomplish this, as I don’t have whole days of free time in the next little while.  I am really happy with the path that I made with blue chip rock, and my choices of plants so far.  If I get a chance, one day I will “map out” my garden beds to give you guys an idea of what I actually have planted in there.

The back lawn is calling my name…… sigh.

Thursday, 23 May 2013

I’ve got worms!

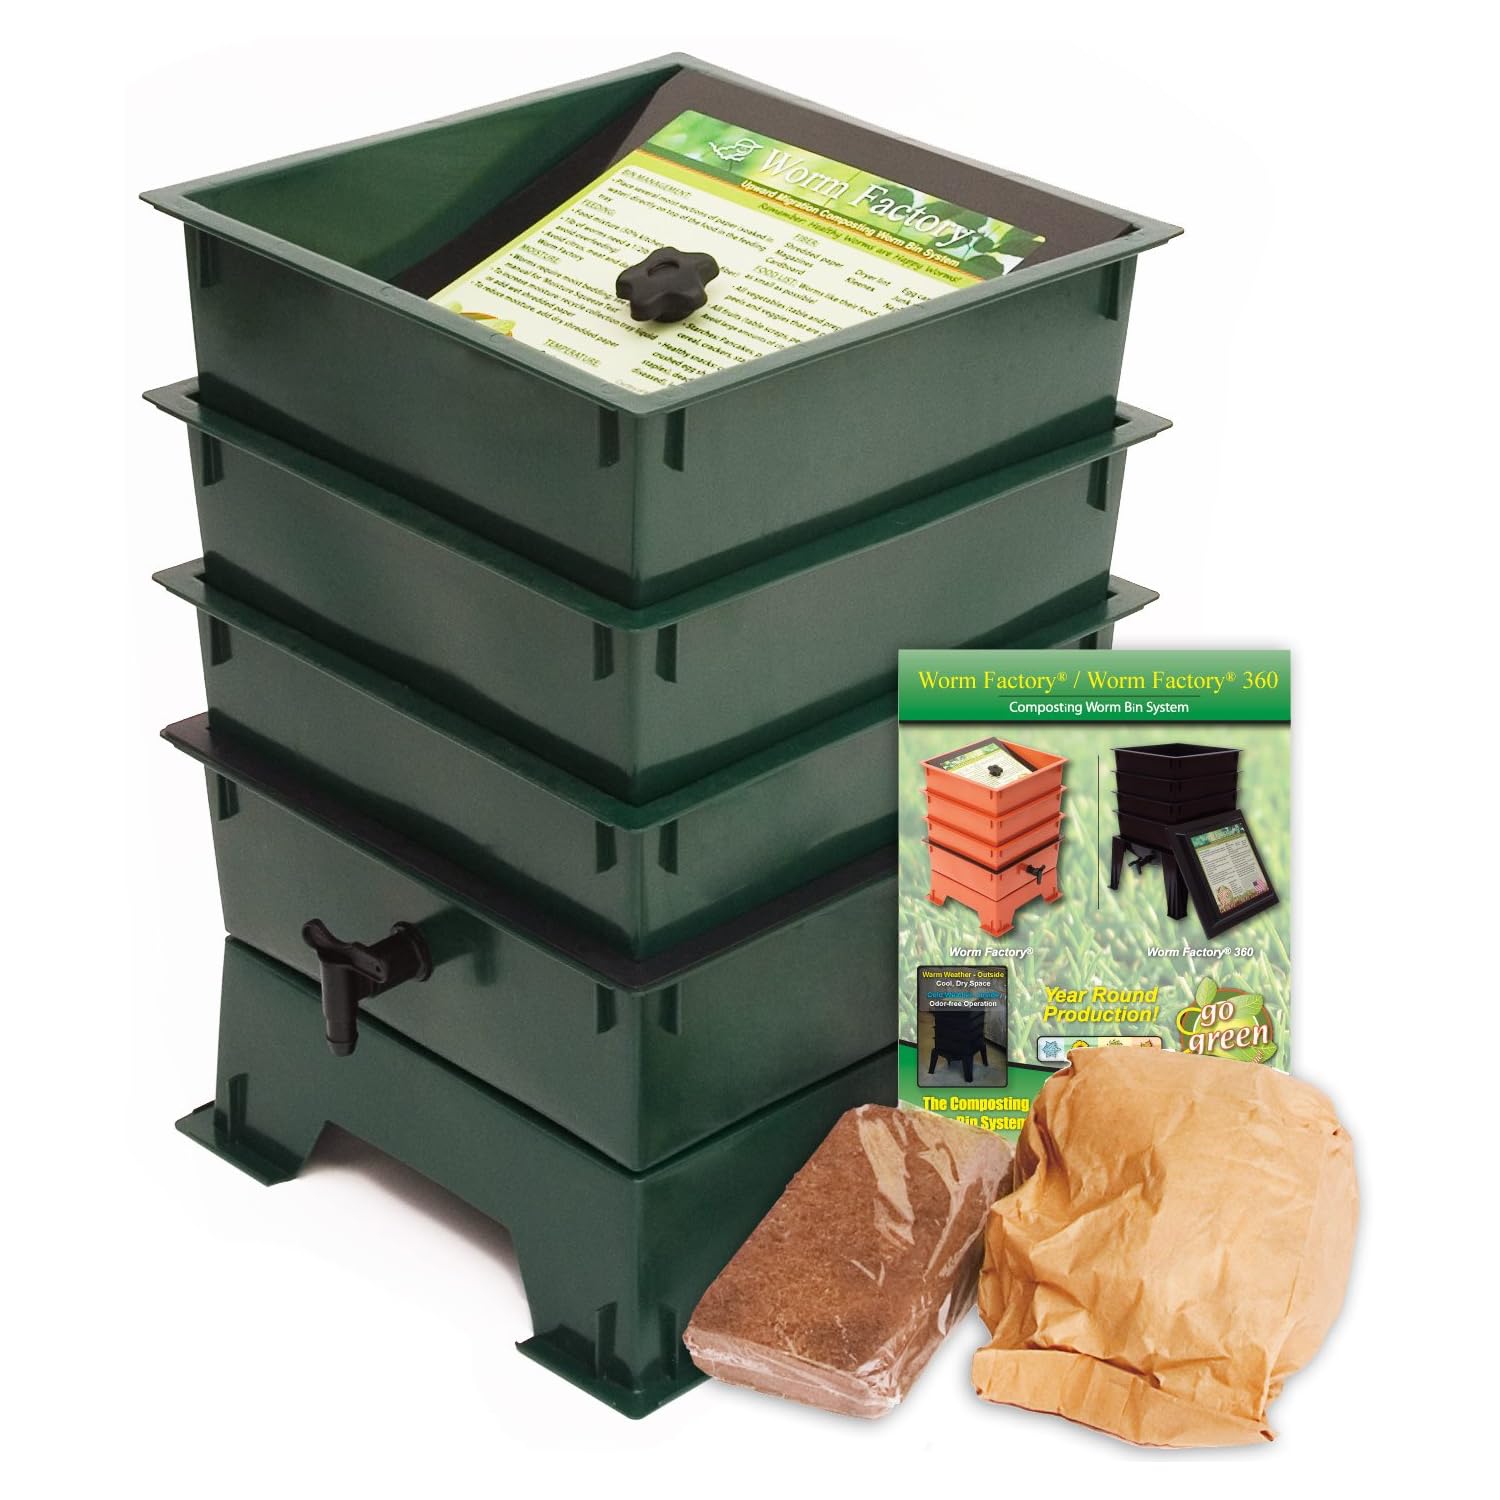
I knew I’d get you with that title!  Not parasites, but red wigglers! I decided that the best way for me to get rid of my produce/bread/pasta/grain/newspaper waste was to do vermiculture…. aka, having a worm farm!  I wanted something small enough for just me… so I invested in a Worm Factory, which can be inside (in the winter) or outside (from the spring to the fall). Until the worms get settled, it will be inside. The best thing about having a worm farm like this, is that you have a spigot to harvest the compost “tea” for healthy fertilizer for your houseplants etc.

The worm farm I chose was from Amazon.ca . . . Nature’s Footprint.  It is expandable incase I get it going really well, and get my neighbours involved!


My compost outside did not have a huge amount of worms in it (I have to admit that I have neglected my composter for the past 6 months).  So I opted to purchase some worms through Burnaby Red Wigglers.  I mailed off my cheque, and before you knew it, I had worms arrive at my door! He also has some information here. Very nice to deal with! Wish I lived in the Lower Mainland to get to one of his workshops.

DSC02154

Here’s a picture of the worms…. most were hiding, but I could tell that there were lots of “babies” in there.

DSC02159

I’m trying to convince Cody that we have new “pets” in the house LOL!

DSC02160

Once I get this worm farm producing, I will post more of my vermicompost adventures!

Monday, 20 May 2013

May 20th Gardening update

Well, I’ve procrastinated long enough. I’ve been meaning to take out the front lawn, and have started the process.  By hand. I don’t think I will make the deadline I set in last month’s post. I can’t believe that it has almost been 1 month since that post!!!
Cody enjoyed being out there with me.. some before, during and after pictures for you.  I ended up getting about 1/3 of the lawn dug out. I think in practicality, I will leave a strip around 8 ft deep in the front of the “lawn” that will just be covered with plastic and bark mulch this year. I’m thinking that it will take a good three years for the front lawn to be the way I envision it turning out.  Cross your fingers for me!
DSC02118DSC02121
Above, the view of the yard from the neighbor's side, and Cody enjoying being outside with me.
DSC02117DSC02153
Above, Cody was trying not to be in the way, but invariably was right where I wanted to dig. Then the view from my side of the work in progress. That big pile is sod that I’ve shaken the dirt out of (for the most part)…. not sure how I’m going to get rid of it!
So, the game plan is to get the majority of the sod dug out by Thursday night. Friday and Saturday I will be getting 50/50 mix to enrich the areas I plan to plant, as well as a healthy amount of shredding fir mulch to cover the planted beds.  Oh! I forgot to mention it, but I will be getting pea gravel to make a pathway between our places for the mailman and us to use.  Stay tuned!!!!

Friday, 17 May 2013

My White Bread Recipe

I find it amazing at how expensive a loaf of bread is to buy these days! It really makes sense to make your own, even with the higher cost of flour.  I’ve never really used a recipe for bread making, when making it by hand. I do use proportions. I know what size of loaf I want to make, and how much liquid it takes to make it. I started off with the liquid and yeast, and then added my dry ingredients until it felt right. Being single again, it doesn’t make sense to make 5 loaves at a time, so I’m using my bread maker again. You can’t fudge with a recipe with a bread maker, and expect it to turn out right… but once you have the proportions down pat, you can consistently make great bread!  Here is my recipe, in the order that I measure it. I use a scale, and put the baking insert on the scale and use the tare function as required to weigh out the ingredients in this order:

Shelley’s White Bread = 2 lb. loaf

  • 315 gm. warm water
  • 15 gm. lemon juice
  • 5 gm. salt
  • 15 gm. oil or combination (oil, butter)
  • 15 gm. sugar (your choice, I usually use white)
  • 500 gm. flour
  • 15 gm. potato flour (or starch)
  • 5 gm. gluten powder
  • 7 gm. yeast (2 tsp.)


I use the medium color crust, and 2 lb loaf setting on my bread maker.  It turns out just the way I like it. The potato flour makes it soft, and the lemon juice, gluten powder work with the flour to increase the ability of the dough to rise.

Now…. drum roll please! Here’s what it looks like!

DSC02113

How do you make bread? Do you have a favorite recipe or method? I’d love to hear about it in the comments below!

Wednesday, 15 May 2013

F is for Father

Actually, F was my co-worker’s husband’s first initial… I had fun making this card for her family to give him (they were giving him money to buy his own IPad). I designed the card to look like it was a piece of technology (I hope!), with his initial and an APPLE logo attached to it. I also made a tab to simulate a closing tab of an IPad case. It is to scale in size with a regular IPad too! You could take the idea and run with it, by changing the wording around the border of the “screen”. As usual, lots of room for personal notes of love

Smile

happy birthday insertDSC01773

On the inside I made a money holder by embossing a flap and gluing it onto the card. The white embossed piece of paper is just to guide the money out of the flap. I used Serif's Draw PlusX5 to make the inside signing insert... I find that program makes it just too easy to make a shape and then put wording around it. Silhouette Studio does an ok job at do that as well, although if the project is large, it bogs down the program significantly IMHO.

DSC01772

I hope you enjoyed the card! And thanks for visiting from the Card a Day Blog too!

I’m going to post a Father’s Day poem this coming week, so stay tuned!

Wednesday, 1 May 2013

Sweet Invitations

Thanks for visiting from the Card a Day Blog! This is the first of May (unbelievable eh?), and the first card of a new theme - Invitations.

I’m planning a BBQ this summer for my co-workers to come and enjoy an evening of fun in my backyard (if I ever get my yard work done!).   My yard is small, and I’ve been trying to think of what activities I can have with a varied group of adults.  Hmmm lawn darts… ring toss… crocket… I think the type of party I want is an old fashioned, be a kid-type party, not the bring your own beer and drink too much type party. I hope you like it! The card size is 6 inches square.


The one thing about invitations is that if you don't have a whole lot of time, and want to mass produce them, for me, its just a printed/digital card.  I find myself using Sihouette's Studio to do a lot of these cards, as there is a lot of choices in their store for things to put on the cards.  I chose two regular cutting files, and colored them in the program, set them not to cut, and then printed them out.  If I would have had time, I would have cut out the "You're Invited" part of the card, printed the rest, and used a clear dimensional highlighter for the rose in the vase.
The table and chairs were the "Bistro Table and Chairs" file by Sarah Baily. The "You're Invited Title" was by Jamie.

I hope this gives you an idea of what you can do on short notice to make a sweet card :-)

Join our May Challenge!