Saturday 27 April 2013

April 27th Gardening updates

Today I am so excited to go to the mushroom workshop at Tsolum River Truffula Tree Farm!  I realize though that I’ve not done a gardening update.  I’ve been so busy trying to get the yard in order, and renovating what I have.
My goals this year:
  1. Raised garden beds in the back yard.
  2. Re-do the lawn edging along the path in the back yard, from the house to the workshop. I want to use landscape ties instead of the plastic edging. When doing this I want to incorporate a future fire pit/ bbq area  (On my bucket list is to make a Cobb Fireplace/Rocket Stove/Oven). I’m still pondering how I’m going to do this.
  3. Weed and mulch the soil under the Prune Plum tree to plant “Garden Giant” mushroom spawn.
  4. Completely redo the planter bed between the deck and the workshop. Its overgrown with weeds and lawn seed that I missed vacuuming up (long story from last year I did not share online). Mulch it well so it will be lower maintenance than it is now.
  5. Take out the lawn from the front yard. Plant with shrubs, perennials and annuals, and mulch heavily to make it low maintenance.
I’ve got #1 done on the list, although I still have to tweak the positioning of the landscape ties that separate the garden from the lawn.  The wood I used was 2”x12”, and it provides a good height that the dog thinks is separate, and so far hasn’t gone into (crossing fingers!)
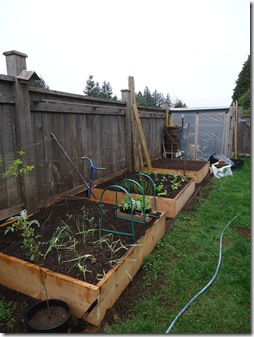
Here’s a picture of the back yard garden, the first picture is when I was making them, and the second picture is filled and partially planted. 
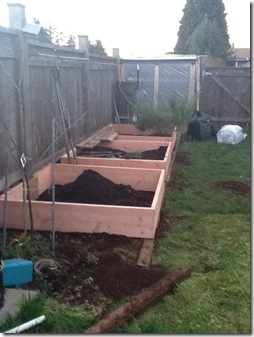

Photo 2013-04-07 8 06 19 PMDSC02057
In the first bed I have 1/4 planted with Garlic, 1/4 planted with one Cardoon, 1/6th planted with Sugar Snap Peas, 1/6th planted with Red Russian Kale, and 1/6th to be planted (I’m thinking with Perpetual Spinach).
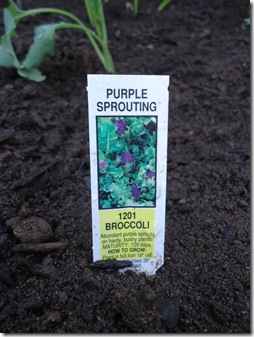
In the second bed the planting is more free-form. I planted a one foot by five foot strip of sugar snap peas along side the fence. The central part of the bed has five sprouting purple broccoli plants, surrounded by three different types of lettuce (12 plants total). The remaining part of the bed is filled with “walking onions” (Egyptian walking onions… you treat them like green onions, snipping what you need, and then let them go to seed… they form bulbuls that make at least five more plants!)
I’m debating on what to plant in the last bed, closest to the greenhouse.  I’m thinking squash, although I may try the Three Sister’s Planting method one more time. I know that I want a good planting of Purple Peacock Pole Beans - I really enjoyed them last year!
I should note that between the last bed and the greenhouse is a Lovage plant that barely survived me digging it out and leaving it “bare” over the winter.
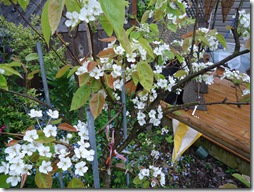
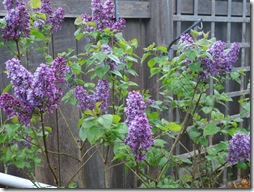
Below, Lilac and Asian Pear Tree in bloom.
DSC02062DSC02060
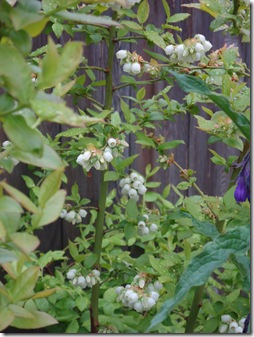
Below, the info. for the Purple Sprouting Broccoli, and Blueberries in bloom.
DSC02059DSC02061
My Dad used to say “no rest for the wicked”…. Now, I really didn’t think I was that bad!!!!
Stay tuned for more gardening updates in the next month or so… did I tell you I wanted to accomplish this all by the end of next month?????? YIKES!
Thursday 25 April 2013

Card a Day Blog ….. Oh Wishing Well …..

DSC02056
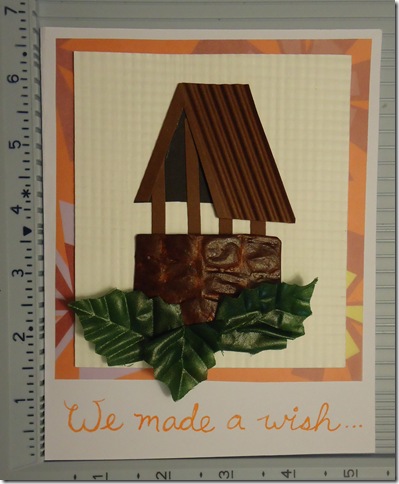
This week one of the RN’s I work with is retiring after over 35 years of service… Our department wanted to make a card and include something special for her (shhhhh! It’s a secret!).
I thought a wishing well would be the perfect thing to put on her card, as we were making a wish for her success in retirement!
I had a lot of fun making this card… I started out with the idea of a wishing well… thought about doing it with a print and cut with my Silhouette, but opted to make it from scratch.
The card base is approx. 5 inches by 7 inches. 
I made a cream colored background out of some cardboard I had, and ran it through my crimper both ways several times… it made a subtle texture, and softened the tone.  I layered that on some velum, and cut it out to be a border. 
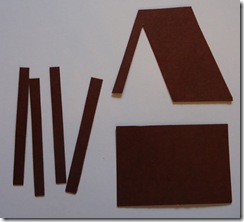
The real fun came with making the well. I had some nice rich brown cardstock, as well as some leather textured art paper.  For the top of the well, I basically cut out these pieces, and ran them through the crimper (except for the left side of the roof and the posts).
DSC02053
After crimping, I cut a piece of black cardstock to be the shadow of the inside of the roof. I also taped on the leather textured paper onto the well part… it was a fussy cut, as I wanted it to simulate stone, so I really chose what area I used on the paper.
Then it was simply to use glue, tape and double sided foam adhesive to put it all together.  I felt it needed greenery, and instead of fussy cutting grass, I used some silk leaves from an arrangement I had in my house.
On the outside I wrote: We made a wish.
On the inside is : we hope your every success!
Sorry I don’t have more pictures to share with you… just wanted to give you an idea of an easy card to do Smile

Thanks for visiting from the Card a Day Blog! Make sure to visit again soon for more card making inspiration!

Monday 15 April 2013

Camping and a Mother’s Day Card

This past weekend I was camping to celebrate my birthday.
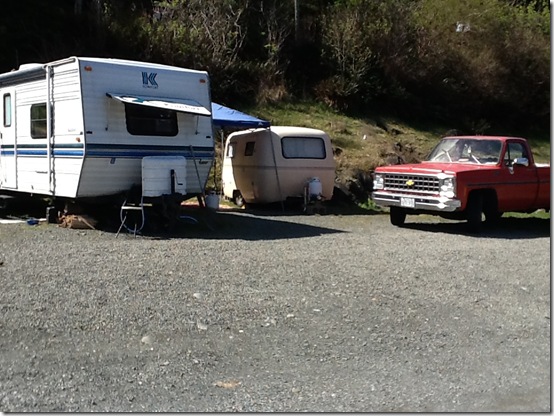
I stayed at the Kelsey Bay RV Campsite.... here are some pictures of where I camped!
My little trailer tucked in behind my friends trailer Smile
Photo 2013-04-14 12 09 56 PM
Not quite the panoramic picture… but gives you the feel of what I looked at from my trailer, looking east. It was a really nice campsite, only six sites, but cozy and with a heated washroom!
This side of the inside passage is the one that the cruise ships go up, and it is so close it would be a wonderful place to stay in the summertime, to see the cruise ships pass by at night! (take a look at their website, and you'll see how close the cruise ships travel past!)
Photo 2013-04-14 12 14 41 PMPhoto 2013-04-14 12 14 46 PMPhoto 2013-04-14 12 14 50 PM
I had a wonderful time, but knew I had to do this card for the Card a Day Blog. I thought it would be a great opportunity to remind everyone that you can do a neat card with just a few items…. that and the fact I did not have a lot of room to pack lots of crafting stuff!
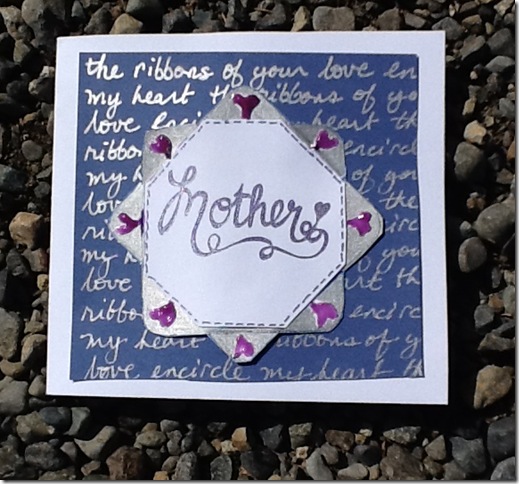
I made this card with a white piece of card stock, approximately a 5 inch square piece of colored card stock, silver felt pens, and some dimensional glue (colored) that I had, as well as a regular gel ink pen.  The phrase I wrote on the background was “the ribbons of your love encircle my heart”. It was an anonymous phrase I got off of  quotegarden.com… and only now I realize that I did the quote wrong! It was supposed to be “the ribbons of your love are woven around my heart”!  Oh well, the meaning to me is the same.
The tag was cut out of a piece of white cardstock (I used a box to help make the template), then decorated with silver markers, glue and regular pen… glued on top of the written card base - simple!
Enjoy, and remember to challenge yourself to do a card with less, not more!
Photo 2013-04-14 12 10 18 PM
Thanks for visiting, and come back soon!

Sunday 7 April 2013

Spring Birthday

Thanks for joining me from the Card a Day Blog, with the first card in our Spring theme! Spring is the season for new life, and this certainly rings true in my family - 5 birthdays! Needless to say I combined the themes!
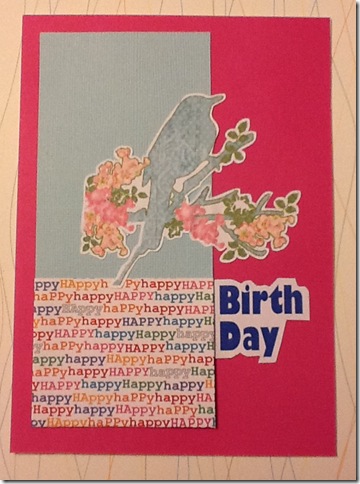
I made this quick card trying to utilize the “rule of thirds” to balance out the composition. I started by raiding my paper stash to pick out some spring colors. Bright pink for my granddaughter, who will receive this card. Pale blue for the sky that is not so rainy anymore where I live (thank Heavens!). The HappyHappyHappy paper is from a Circuit pad “beyond birthdays” that I’ve had for a while.  The bird on a flower branch is from Silhouette Studio’s designer Rhona Farrer “House of Three”, called “House of 3 bird collage”. 
The card base is 5” x 7”. I glued the pink paper on top of it and trimmed it to match.
The blue strip of paper 2 3/4” x 6 1/2”, I wrapped and glued on the Happy Happy paper on the bottom third of the strip.
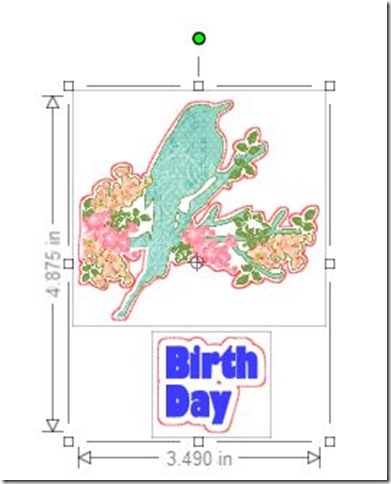
In Studio, I chose the bird inspiration and resized it and flipped it so it faced the way I wanted it to.
I made the Birth Day title and print and cut both items out. Here is what my screen looked like:
spring birthday
Once I had everything together, it was a simple glue or tape it to finish it!
springbirthday
I hope you enjoyed this card. Remember to visit the Card a Day Blog tomorrow for some more Spring inspiration from Jill! And don’t forget that you inspire us too! Join us in our April Challenge at the Card a Day Blog!

Monday 1 April 2013

Ahhhhh… The Inspiration!

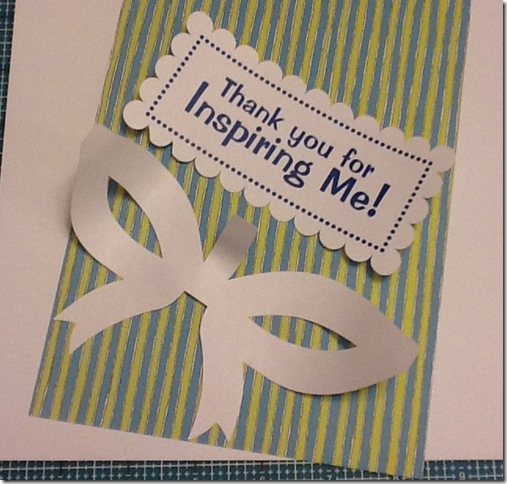
Today at the Card a Day Blog I am starting the new theme of Teacher Appreciation!  When I think of teachers, I think of how many of them inspired me to stretch my imagination, to look at things in different ways, and to really exercise my mind.  I wanted to create a simple card that would allow the sentiment on the front to take center stage… I think it worked, do you?

teacher appreciation2 

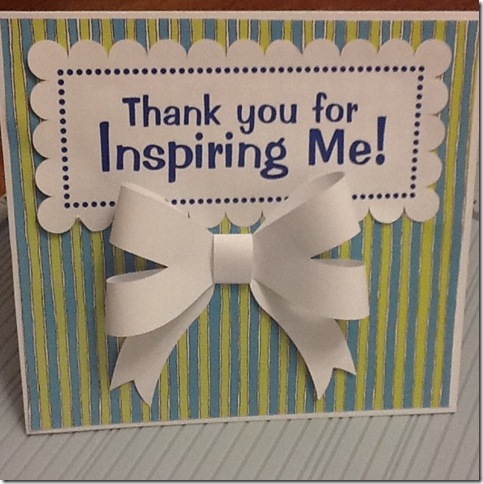
It is so simple to make this card, I know I will be making it again with other sentiments and cardstock.  I designed it in Silhouette Studio, for a simple print & cut (no time to do more cutting and layering… and wanted it super simple!).  Here is what my program looked like before doing the print and cut:

teacher appreciation

And the pieces before final assembling:

teacher appreciation1

The card is 5 1/2 inches tall by 6 inches wide.

I cut the striped paper a scant 1/4 of an inch smaller (5 1/4 inches square) to allow the white cardstock to frame it. Then it was simply to glue the tag on, and glue the bow together and on…. Simple! 

I only wish that Studio made it simple to right click and find out the artist who I bought the shapes from… I’ve got thousands of shapes in my library, and do not have them recorded the way I should to give proper credit.  Once I get my craft room organized, I will be hopefully making my own shapes to share in SVG format for you all to enjoy!

There will be more inspiration for Teacher Appreciation tomorrow from Darla Haverstock… so make sure to visit the Card a Day Blog and join us in the April Challenge!